

Creating a Window to the Past: How to Build Location-Based AR for Historical Places


Introduction
Welcome to our digital diary! This blog post is dedicated to peoples who will embark on a similar journey of blending technology with history. We recently wrapped up a project that was both challenging and exhilarating: creating an Augmented Reality (AR) experience showcasing the historical transformation of Kent Street and Webster Place. This endeavor was part of our internship at Brookline Interactive Group, under the invaluable guidance of our mentor, Alexia Lalande.
Initial Research and Resources

Our first step was to dive deep into the history of our chosen locations. We leveraged a wealth of information from Brookline News, which became our primary source for understanding the past. These resources, shared by Alexia, included historical narratives and old photographs, which were crucial in visualizing the transformation we aimed to recreate.
Step-by-Step Building Process 3D Modeling with Blender
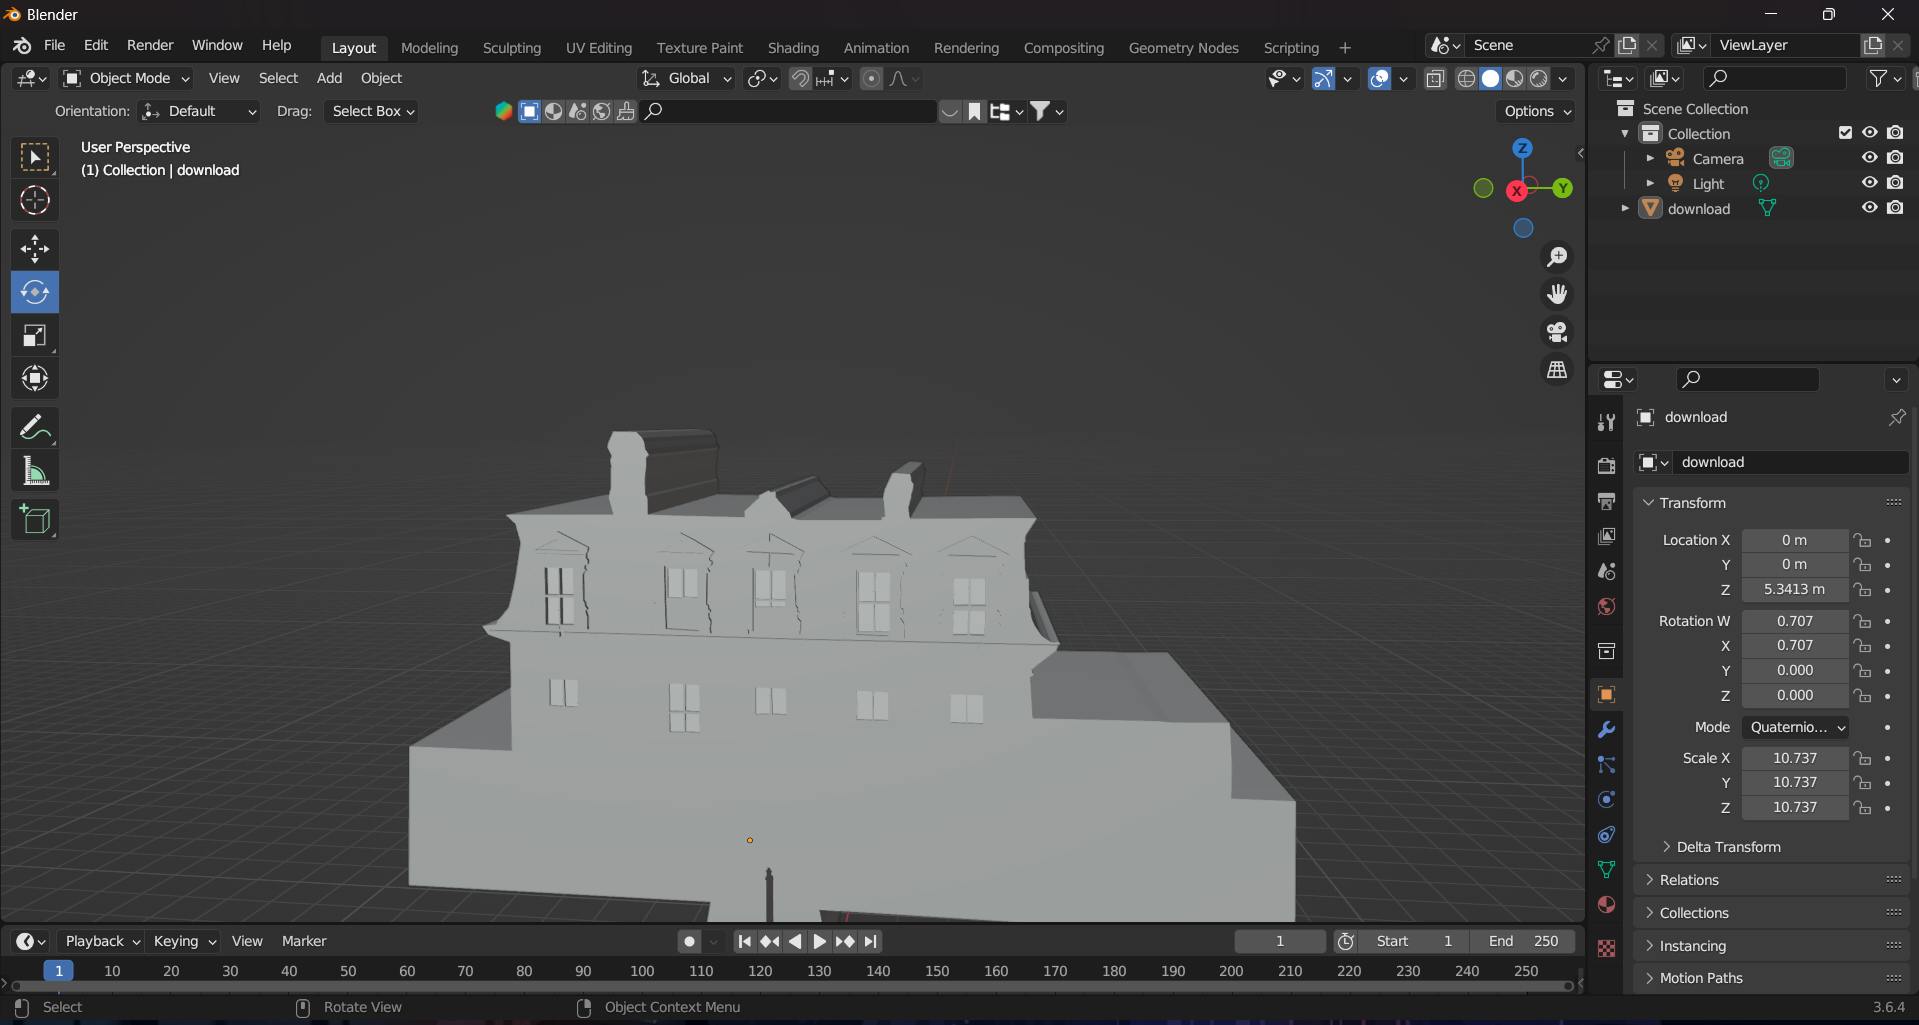
Gathering Reference Images: We started by collecting old photographs of Kent Street and Webster Place. These images served as a blueprint for our 3D models.
Modeling in Blender: With Blender, an open-source 3D creation suite, we embarked on recreating these historical buildings.
The process involved:
Setting up the workspace and importing reference images.
Using Blender's modeling tools to craft 3D structures that mirrored the architectural style of the past.
Applying textures to give the models a realistic appearance.
Implementing Adobe Aero
Understanding Adobe Aero : Adobe Aero allows the integration of 3D models into real-world environments using AR. It’s particularly adept at placing content accurately within physical locations.
Placing 3D Models: We utilized Adobe Aero's Geospatial Creator, powered by ARCore and Google Maps, to position our 3D models on the actual locations. Precise coordinates were necessary for accurate placement, which we obtained thanks to Alexia's on-site visit. Testing and Refinement The Adobe Aero Player mobile application was our primary tool for testing. Here’s how we did it:
Initial Testing
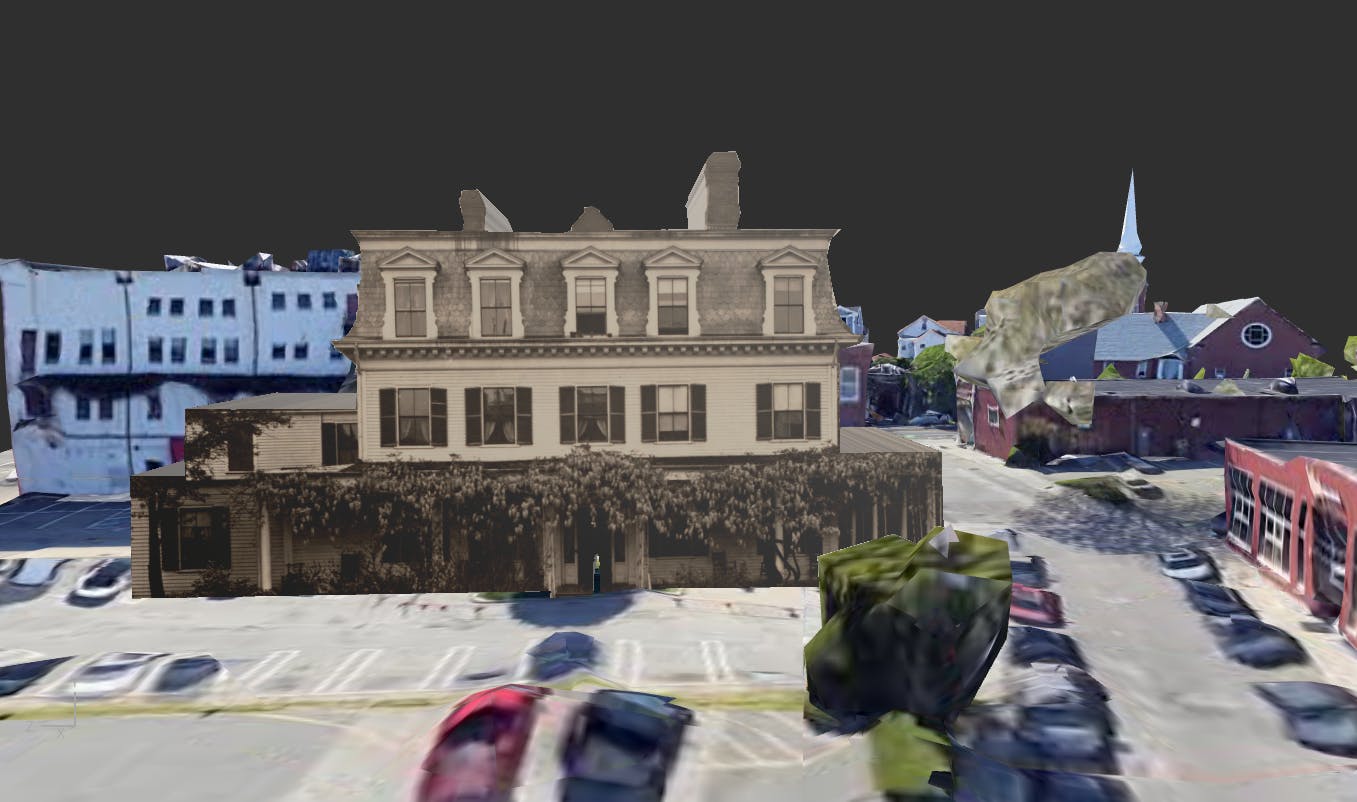
We first viewed the AR models on-site through our mobile devices. This step was crucial to see how well our digital creations blended with the real world.
Feedback and Refinement: Based on our observations and mentor feedback, we made several adjustments to ensure the models were accurately aligned and appeared realistic. Challenges Faced Our main hurdle was ensuring the 3D models were placed precisely where the historical buildings once stood. The solution came from a blend of technology and human intervention; Alexia's visit to the site provided us with the exact coordinates needed for an accurate AR experience.
Conclusion
This project was not just about mastering AR technology; it was a journey through time, bringing the past to life in the streets of Brookline. We hope this blog serves as a detailed guide for future interns, illuminating the path to creating meaningful and immersive AR experiences.
Resources
Get started with the Geospatial Creator in Adobe Aero pre-release (google.com)
SUBSCRIBE TO NEWSLETTER
For More, Follow Us:
LINKEDIN (Seikh Nabab Uddin), LINKEDIN(Samik Mandal) (Collaborator)
X
Medium